Topographia

Who doesn’t love a little geography? Topographia began as a project with Spring Leaf Press some time ago and gradually eroded. It resurfaced as I was going through the unfinished project pile. I struggled with choosing to complete it versus tossing the whole thing in the trash. I decided to keep the pages, but didn’t know how to finish them.

I moved one step closer to making an actual book by reinforcing the card stock pages with book cloth and sewing the text signatures onto tapes. I did it twice, because the initial thread I used wasn’t strong enough.

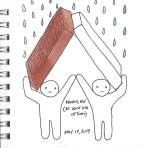
The book languished for another three months before I tackled it, largely because I wanted to participate in a rapidly approaching exhibit. When I first began the project, I imagined a three dimensional cover that represented a raised map, and I decided to run with that. I used book board as a base and paper mache to sculpt ridges and valleys. I cut slits in the book board beforehand to allow for the tapes to be threaded through it. Because I procrastinated, I needed my covers to dry quickly, so I popped them in the oven at 250 degrees. This decreased the drying time, but increased the warping. I put weights on the covers as they came out of the oven to help maintain flatness.

Next, I used acrylic paint to help the landscape along. Once it was dry, I threaded and glued in the tapes, leaving them exposed on the inside cover.

The end result reminds me a lot of a fifth grade diorama; rough, but full of charm.

I got it to the exhibit on time and displayed it with a few of my other artist’s books in June of 2017 (yipes!). There was great opening night participation, and it also turned out to be an interesting exercise in encouraging viewers to touch the art.

When I learned I was leaving for the left coast, I packed it up with other art paraphernalia and brought it along. It recently made another appearance at Hidden Villa’s Homesteading Day, where it mostly delighted kids of varying ages.

Maybe there’s some truth to the diorama.

22 months and counting

It’s been almost two years since I have posted any artwork, processes, or collaborations. It’s also been almost that long since I have completed a piece of art.  With the exception of a few gifts and illustration commissions, there has been very little follow through on any creative ideas.

What has occurred, you may ask,  that has resulted in this lull? Well, I may say, I moved to California a year ago this week. I accepted a position at Hidden Villa, an educational nonprofit I have a decade long relationship with. It solved the distance dilemma with the boyfriend, now spouse. I gave up the seasonal associative disorder of  overcast Central Pennsylvania and embraced the sun induced psychosis of the Peninsula. It is hard to be so far from my family and pup, Andromeda Starchild, but a gift to be near my Love, and my best friend and her family.  Despite the amount of time, the move here has left me unsettled. It’s been a challenge to start, work on, and complete an art project of any scale. And although I do not lack for ideas, I’ve felt creatively vacant.

With a year of California behind me, and a future that promises a lot of continued change, now seems like the appropriate time to start making art. Stay tuned.

In the meantime, here is a snapshot of the past 18 months through journal entries.


6×6

https://i0.wp.com/www.artalliancegallerydowntown.org/wp-content/uploads/2017/01/six-by-six-email-square-lg.jpg

This year the Art Alliance is hosting a fundraiser and exhibition that will be debuting during the week of the Central Pennsylvania Festival of the Arts. All pieces will be six inches by six inches (add another six for 3D art) and be sold for $25.00 each. Sales will go toward supporting the Downtown Gallery. Opening night is July 12 from 7pm to 9 pm. The show goes until the end of July.

More information at the Art Alliance.

I will be donating four squares:


hug


cactusbook


Show up. Buy art. See you there.

Intentacles

Part X

Arms with affirmation. Limbs without limits. Feelers with feeling? Current project: how do you hold hands with someone 2,700 miles away?

Hands are complicated. There are drawing classes where students focus on heads, feet and hands for an entire semester. Our fingerprints are unique and our palm markings change over time. We can support our entire body weight on a few fingertips. Hands have one of the highest sensory capacities of the body. Our hands can embody an entire language.

Do you know what else has some impressive appendages? The octopus. They use their tentacles for locomotion, fighting, tasting and exploring (They also have three hearts, but that’s a project for another time). Yet no matter how exceptional hands and tentacles are, I still cannot reach mine across the U.S.

I had to pretend a little. I also went with the octopus, because a pointed tube is easier to shape out of fabric than digits. I drafted a pattern of a tentacle and sewed a mock up so I had a good idea of what the finished product would look like. I made a few adaptations, and then cut out my pieces, leaving a generous seam allowance (just in case). After a soda ash soak, I used Rit and very old (vintage!) ink to stain the fabric. For the back side, I used a shibori technique that involved wrapping the fabric around some rope and then compressing it. The representation of the suckers was produced by dropping ink onto damp fabric.


Next, I used fabric paint to accentuate the existing dye patterns.


I sewed the pieces together, leaving a space for stuffing. I fitted the bottom with a piece of cardboard and a weight to add stability. I glued neodymium magnets to the inside of each tentacle. I also included a reminder to share my heart.  The tentacles were stuffed with shredded memory foam and fiberfill.


Although pleased with the outcome, I didn’t leave quite enough room to hold hands in the chaste way I envisioned. They ended up being a bit more intimate than anticipated.


Part O

My counterpart took a more literal approach to the hand holding quandary. After a few tutorials in casting, he used alginate to make an impression of his hand and used silicone to fill the negative space. The result was an accurate reproduction of his left hand with exceptional detail regarding skin texture, nails and palm lines.

He did magic things with wires, a circuit board and battery (actually the process was explained to me several times, but, magic). When the battery is engaged, the hand glows red. According to B., it didn’t work out like he planned. There are a few components he wants to redefine. Ideally the hand responds to computer commands, all of the hardware is hidden within and the silicone has swirly sparkles (that’s mine). Considering that this was the first time B. worked with these techniques and materials, I think it was a successful first attempt. It is wonderful parts creepy and techy. I love it. And I will be boarding a plane at the end of the month.

April

We all can use a little inspiration now and then. All those creative ideas ricocheting around in our heads can make it difficult to just choose one. Sometimes, we can’t overcome the entropy that has temporarily taken over our thought process. Occasionally, deliberating for even a few minutes, about whether or not to put some beauty in the world, feels like a herculean task. April was a project taken on to encourage daily handwork and creativity in my routine and to bring a little unexpected delight to the people I care about.

Each day for the month of April 2016, I made a small piece of art measuring 2 x 3 inches. They varied in complexity and included drawings, a stencil, a stamp, sayings, handmade paper, a recipe, dried flowers, miniature books and paintings. Materials included wax, paper, watercolor, drawing fluid, ink, colored pencil, crayon, hand dyed fabric, paste cloth, polymer clay, seeds and photographs. I made three versions; each individualized for it’s intended recipient (all creative people with limited time and so much going on in their lives).

I put all the cards, willy nilly, in an altered cigar box. I thought about maintaining more order with the pieces, but in the end, the joy of discovery, and sorting through unknown treasures, exceeded my need for structure.

It is my hope that when my people are in want of creative stimulation, they can pull this box off the shelf, sift through its contents, and kick-start a brainstorm of their own.

It so happens that one friend has re purposed the project to entertain her almost two year old. Most of the cards now live in a wallet that travels with them. When he get impatient, the wallet comes out and he plays with the cards. How’s that for creative reuse?

With Conviction

A bridge allows me to get to work each morning. It ties my ideas to their eventual outcomes. It links the plot line in a novel and lets music transition into new notes. It holds your teeth together. And let’s not forget, it’s from where Captain Picard commands his team to explore strange new worlds. Whether literal, or symbolic, a bridge is a promise of evolution.
With Conviction came out of a collaborative project with the Midwest Chapter of the Guild of Bookworkers in November of 2015. Bridges was the theme and the participating artists were free to spiral outward from there.
I quickly settled on my image, but it took a week  before the due date for me to make it concrete. I wanted to make a print, but I did not leave myself enough time. Instead, I painted the original image with watercolor and then worked with my good friend, Photoshop.
My initial effort fell flat. The border I thought I needed provided too much structure and the image felt congested and closed off.
firstgo
My second attempt was right on. Still oppressive, but in the right way.
final
 Participating guild members sent 20 prints to the coordinator. Soon after, we received a copy of each artist’s interpretation of the project. The next step was to make a house for the prints. My original idea was too time consuming. In my head, the short ends of the box folded out and up into trees. Once they were upright the lid could close, creating a stage of sorts. A filament could be attached between the two trees, allowing for a place to hang the print.
I modified the box to fit the time I had left. The lid is secured by a magnet. It opens to show a plexi “bridge” that the images rest on top of. The bottom of the box is lined with Andrea Peterson’s spellbinding moon paper. It wasn’t my initial vision, but I am satisfied with the outcome.
The best part of this project was finding my print’s name. Working titles included:
At Least There Aren’t Any Bears (my favorite)
Beatrix Knew Those Tight Rope Classes Would Come In Handy Some Day
Worth a try
No Safety Net
Light Rope Walking Across the Void
final_flashlight
In the end, I chose With Conviction.

Because at some point, we all need to take a leap of faith.

By the power of Speedball (I have the power)

I’ve had this post in my draft box for two years. It was going to be a critique and comparison about Do It Yourself crafting, fine art and where the two overlap.

Where’s my Venn diagram?

Instead, let’s talk about making art approachable and accessible to beginners in terms of technique and expense by using the following example.

This was a screen printing project; a gift for my bestie’s husband. He is a fan of placemats. And who isn’t a fan of dinosaurs?

Completed carnivore dino placemat

There are a number of ways to go about a screen print. A kit at Dick Blick will run a person anywhere from $25.00 to $472.00, depending on how serious you are about it. The basics are going to include a frame/screen, a squeegee, screen filler, drawing fluid, a brush and, hopefully, an instruction manual. Other materials include photo emulsion, photo emulsion remover, sensitizer, lighting, transparencies, tape and solvent. Whew!

So what if we break it down to five items that can get the job done? A screen, a roll of tape, a shower curtain liner, a defunct gift card and ink. It’s a little less intimidating than photo emulsion and if it turns out you hate screen printing, you haven’t invested too much in supplies.

You can use a piece of shower curtain to create a stencil. The plastic is thick enough to withstand multiple printings, easy to cut with a blade and disposable enough that you’re not going to feel too guilty when you mess up. Tape off your screen. This helps with clean up later. I like to tape my stencil to the back of my screen to ensure it will not slide, but usually it will stay put with ink/pressure. Put some ink at the top of your image and use your gift card to pull the ink through the screen.

Stencils can be as simple, or complicated as you want to make them and the printed results are indistinguishable from a more professional setup.

You might have noticed this post is not a step by step process. There are a lot of tutorials already out there. Check out this one by Catspit Productions:

https://www.youtube.com/watch?v=ND1AUJhdUZc

And while there are other parts of the screen printing process like prepping your screen and registering your image, it doesn’t have to be complicated. Throw that stencil on your screen and have at it. Making art does not have to be cost prohibitive and creating   beautiful/crafty/functional prints is within your power.

Cool Shirt

I love graphic t-shirts. I don’t wear a lot of them anymore, but I did when I was in my teens and twenties. My favorite was a shirt I ordered from Mad Magazine with many incarnations of Alfred E. Newman printed on it. I remember a long sleeved black t with a vampire sleeping in her coffin, purchased at a New Jersey horror convention. I got a lot of wear out of a vintage converse shirt I found thrifting. The t-shirt is long gone, but I cut out the graphic because I couldn’t bear to part with it.

Which leads me to this post. I don’t think of myself as sentimental, but I hate to throw out a good print. It does not seem prudent to hold on to unwearable t-shirts. How often are you going to look at them? Where are you going to put them? And yet, I find myself keeping them anyway.

I finally found a solution. I turn them into book cloth (a subject for another day). It gives me the opportunity to appreciate the graphic one more time  and create one of a kind books for others to enjoy.

I can also tell you where they all came from, in case anyone wants a story with their book. The jackalopes were a memento of a free burlesque show hosted by Indiana University. The show ended with a sparkler in a queen’s behind. Very patriotic.  Everything is fine and the bananas came from the Northern Sun catalog. The koi was from my father- something he picked up at a pond trade show. The glowing red eye is part of a Sepultura (or within same genre) shirt that belonged to an ex. Sheep Unite? Something I screen printed in high school. There were Dead Kennedys lyrics on the back. I am not sure where the dino came from, but I do remember I wore it with duct tape (solid fashion choice) in high school.

Thanks for indulging me.

limos

Save

Eat Your Vegetables

This book is untitled and was spawned from an ongoing Space Paste and Spring Leaf Press collaboration beginning in 2012. This exercise is from March to August of 2014 and the parameters included a miniature book constructed in a day using materials immediately available in the studio. I managed to successfully adhere to two out of the three and I’m good with that.

The book depicts the contents of my csa share  from GroundWork Farms for August 6, 2014. I used watercolor for the vegetable images. A piece of my favorite (but broken) hat, a hemp shoe string and a paste cloth spine became the cover. Other materials included Rives BFK (so predictable- who doesn’t have this in their studio?), archival ink and linen thread.

It was a fun exercise. I had a chance to play around with a material I don’t normally use- hat- and it was successful in creating a farmy feel. I also had an opportunity to incorporate my vegetable images into another venue. They are being used this September as a marketing tool for the  Duveneck Dinner, a fundraising event held by Hidden Villa, a nonprofit educational farm that provides a structure for learning about the environment and social justice in Los Altos Hills, California. Cool, yeah?